Installing Windows Server 2019 Evaluation in VirtualBox
In my previous blog post I showed you how to install VirtualBox
https://eyeteahero.blogspot.com/2019/04/installing-virtual-box-in-mac-os.html
In this blog I will be showing you how to install the evaluation version of Windows Server 2019 in VirtualBox in Mac OS. Although the process is similar in Windows and Linux.
Microsoft offers an evaluation for testing and educational purposes that lasts 180 days (6 months). That should be more than enough time for you to test and learn about Windows Server. This is a great opportunity to learn about all the new features and possibilities in Windows Server 2019!


Now Open VirtualBox. You will see your newly created VM. Click Start.
(VirtualBox is searching for media to boot to. Think of the .iso file as the equivalent of a DVD, CD or bootable USB that contains the operating system files similar to how you would install an Operating System on a physical PC.)
Click Browse, select the .iso file you downloaded at the begging of this manual, probably in your downloads directory and click Start.
After a brief loading screen you will see the initial Installation screen. Change any settings if necessary then click OK.
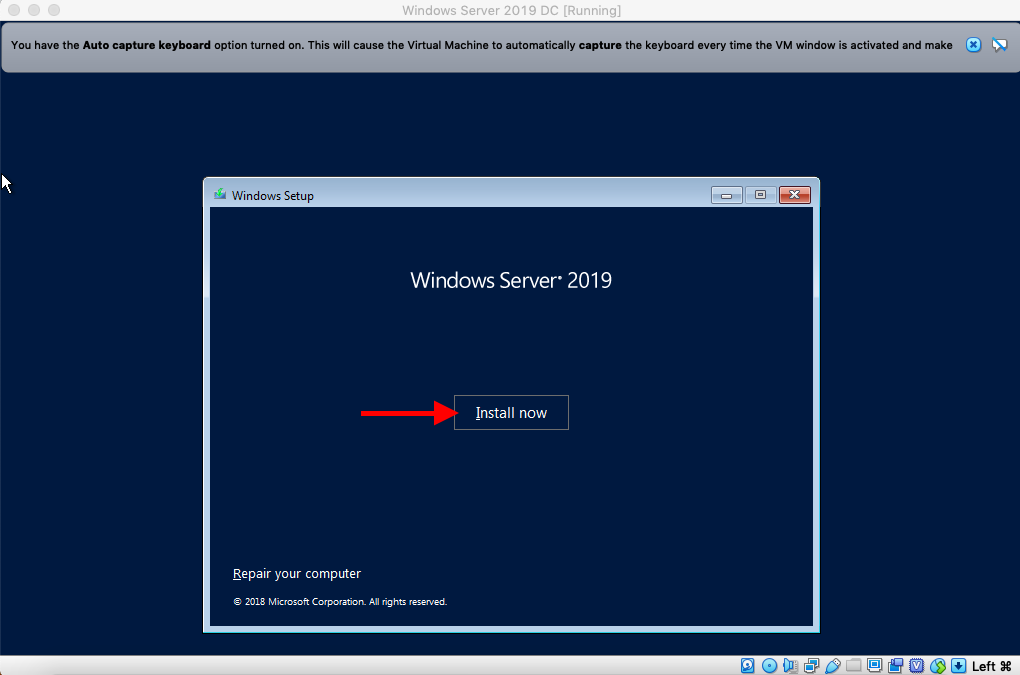
Click Install now.
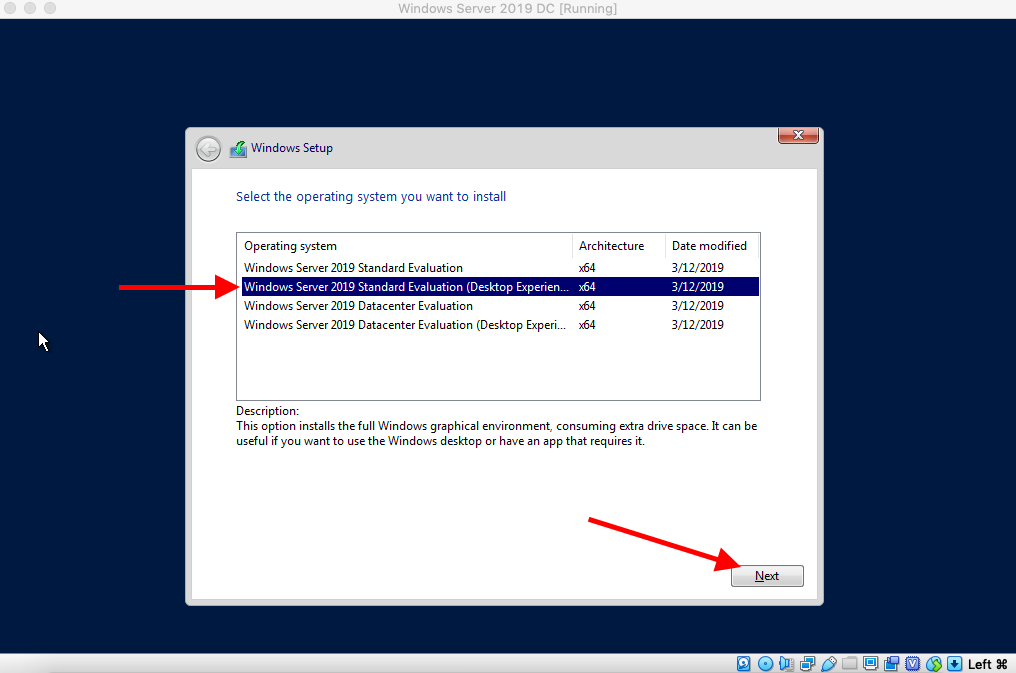
Choose Windows Server 2019 Standard Evaluation (Desktop Experience) and click Next
(Note: For the sake of these blog posts we are going to use Standard instead of Datacenter as Standard seems to be more common in the real world in my experience. Also we will use Desktop Experience simply because I am assuming you are new and the graphical user interface will help. In future blog posts we are going to install Windows Server without a GUI AKA Server Core. Server Core is great because it makes Windows light weight, requires less disk space and resources, requires less patches, updates, and reboots, is more secure, and is more like Linux. Just not all Windows Features and applications support this version though so there are downsides.)
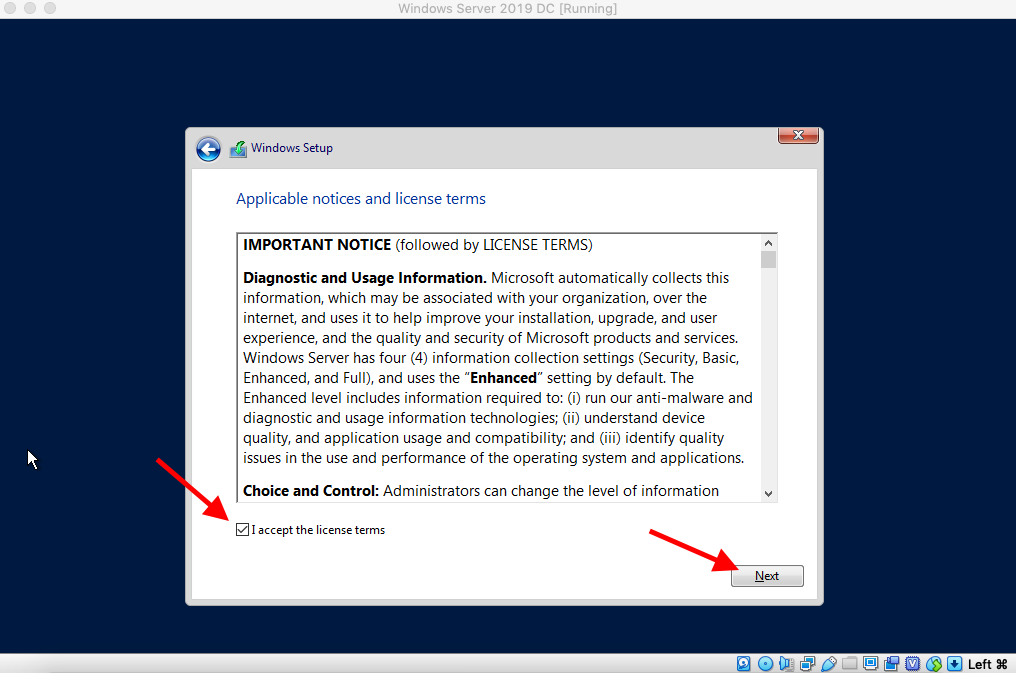
Accept the end user agreement and click Next
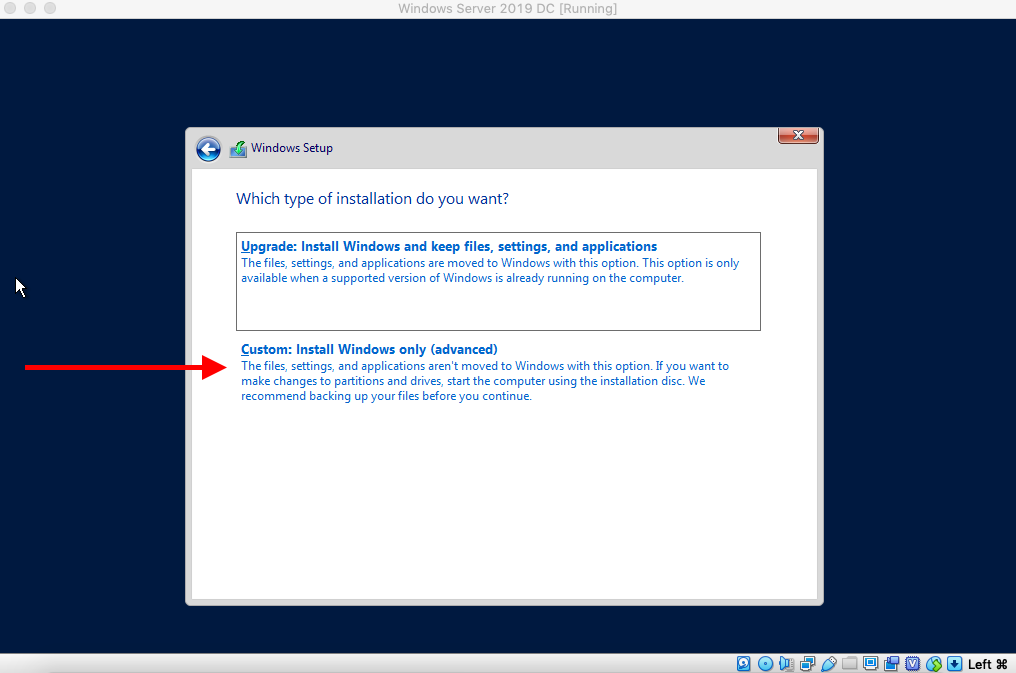
Leave the settings alone and click Next
Wait while Windows installs. This may take 30 minutes depending on your computer.
When it's finished it will automatically reboot and then reboot again. I timed my installation and it took exactly 10 minutes including reboots and loading screens. At the Customize settings screen type your built-in Administrator password twice and hit enter.
You are now at the log on screen. Since Control+Alt+Delete are system keys in order to send them to the VM you need to click Input>Keyboard>Control+Alt+Delete from the VirtualBox menu bar. Then type your password that you created in the previous step and press enter or click the arrow.
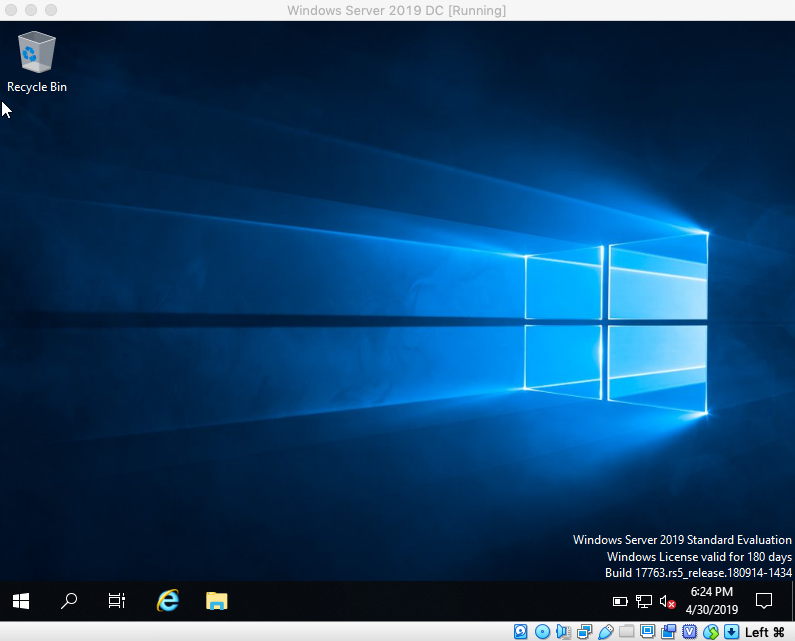
That's it! You are now at the desktop of your new Windows Server 2019 VM. You can see on the bottom right hand side of the screen that you have 180 days remaining in your evaluation. That's 6 months so that will give you a lot of time to practice.
Join me in my next blog where I will be showing you how to install VirtualBox guest additions!
https://eyeteahero.blogspot.com/2019/05/install-virtualbox-guest-additions-in.html
Additional resources:
https://eyeteahero.blogspot.com/2019/04/installing-virtual-box-in-mac-os.html
In this blog I will be showing you how to install the evaluation version of Windows Server 2019 in VirtualBox in Mac OS. Although the process is similar in Windows and Linux.
Microsoft offers an evaluation for testing and educational purposes that lasts 180 days (6 months). That should be more than enough time for you to test and learn about Windows Server. This is a great opportunity to learn about all the new features and possibilities in Windows Server 2019!
1 Download Windows Server 2019 Evaluation ISO
Go to
https://www.microsoft.com/en-us/evalcenter/evaluate-windows-server-2019
Expand the plus sign, click the ISO radio button then click Continue
Fill out the necessary information and click Continue
The download will now begin. The file is 5.11 GB and should take between 5-20 minutes to download depending on your connection speed.
Now that we have the .iso file it is time to install it in VirtualBox
2 Install the VM in VirtualBox
Open VirtualBox then click Machine then New...
Change the name field to something that is a good description. Since we plan to eventually use this VM as a domain controller Windows Server 2019 DC is a good name. Leave everything else default but change the version of Windows to Windows 2016 (64-bit). At the time of this blog VirtualBox did not yet have an option for Server 2019 so we are using the next best option. Click Continue.
Make sure the memory size is 2048MB (2GB) adjust if necessary and click Continue.
Make sure Create a virtual hard disk now is selected and click Create
Make sure VDI is selected and click Continue
Make sure Dynamically allocated is selected and click Continue
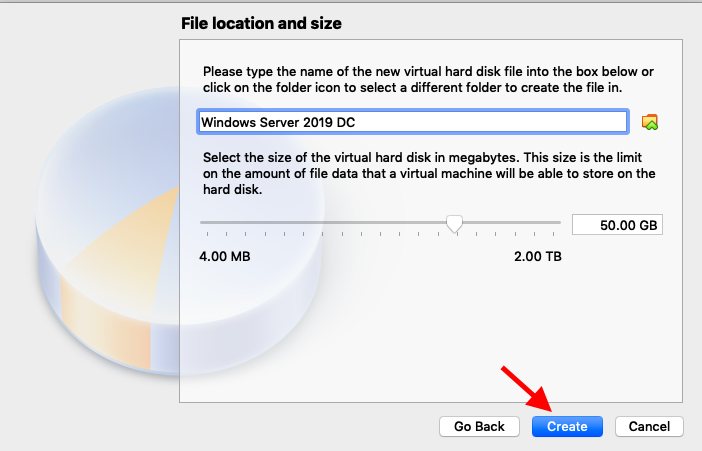
Leave everything default and click Create
3 Install the OS
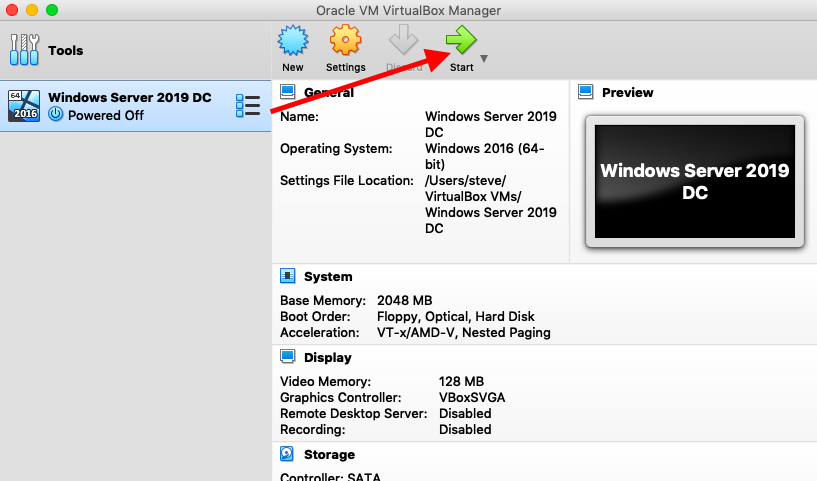
Now Open VirtualBox. You will see your newly created VM. Click Start.
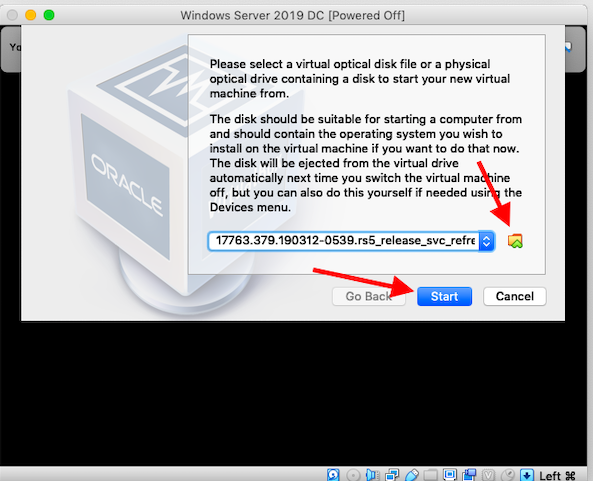
(VirtualBox is searching for media to boot to. Think of the .iso file as the equivalent of a DVD, CD or bootable USB that contains the operating system files similar to how you would install an Operating System on a physical PC.)
Click Browse, select the .iso file you downloaded at the begging of this manual, probably in your downloads directory and click Start.
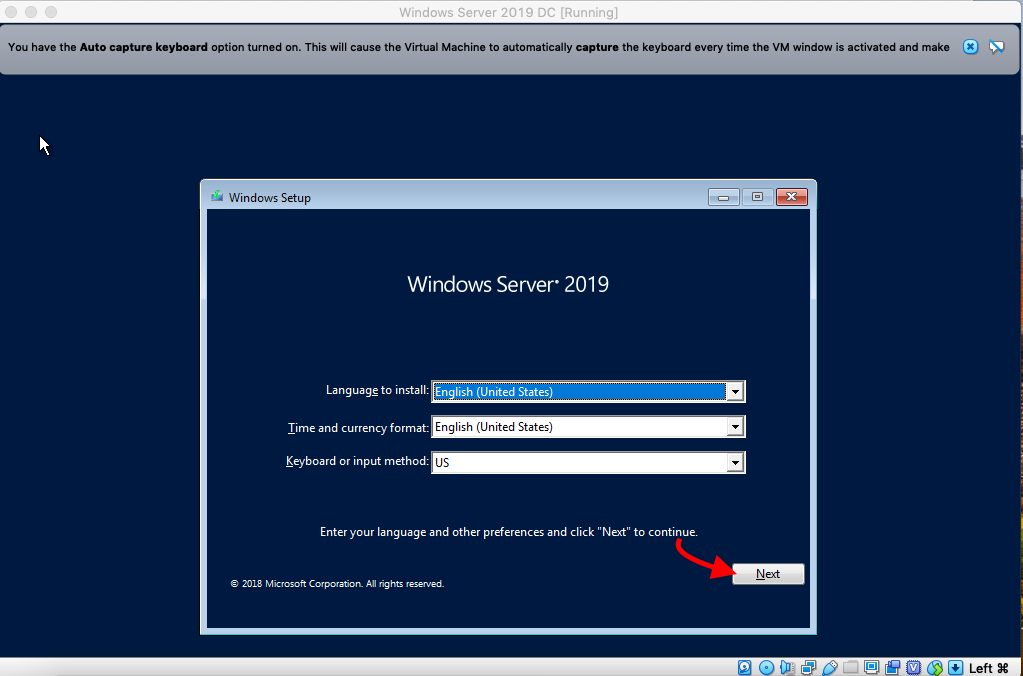
After a brief loading screen you will see the initial Installation screen. Change any settings if necessary then click OK.
Click Install now.
Choose Windows Server 2019 Standard Evaluation (Desktop Experience) and click Next
(Note: For the sake of these blog posts we are going to use Standard instead of Datacenter as Standard seems to be more common in the real world in my experience. Also we will use Desktop Experience simply because I am assuming you are new and the graphical user interface will help. In future blog posts we are going to install Windows Server without a GUI AKA Server Core. Server Core is great because it makes Windows light weight, requires less disk space and resources, requires less patches, updates, and reboots, is more secure, and is more like Linux. Just not all Windows Features and applications support this version though so there are downsides.)
Accept the end user agreement and click Next
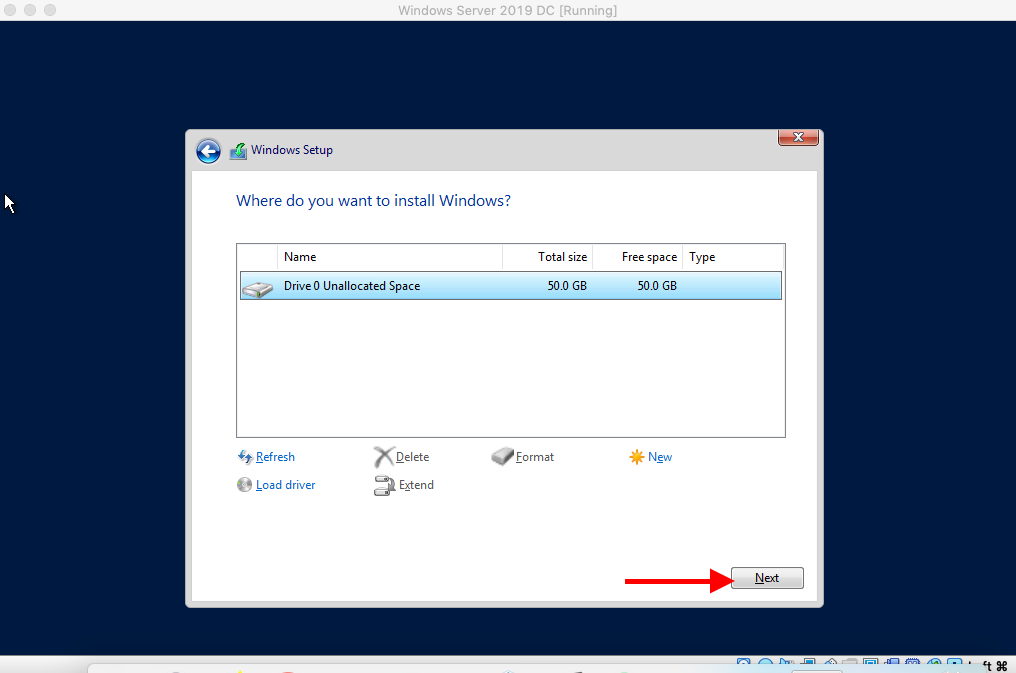
Leave the settings alone and click Next
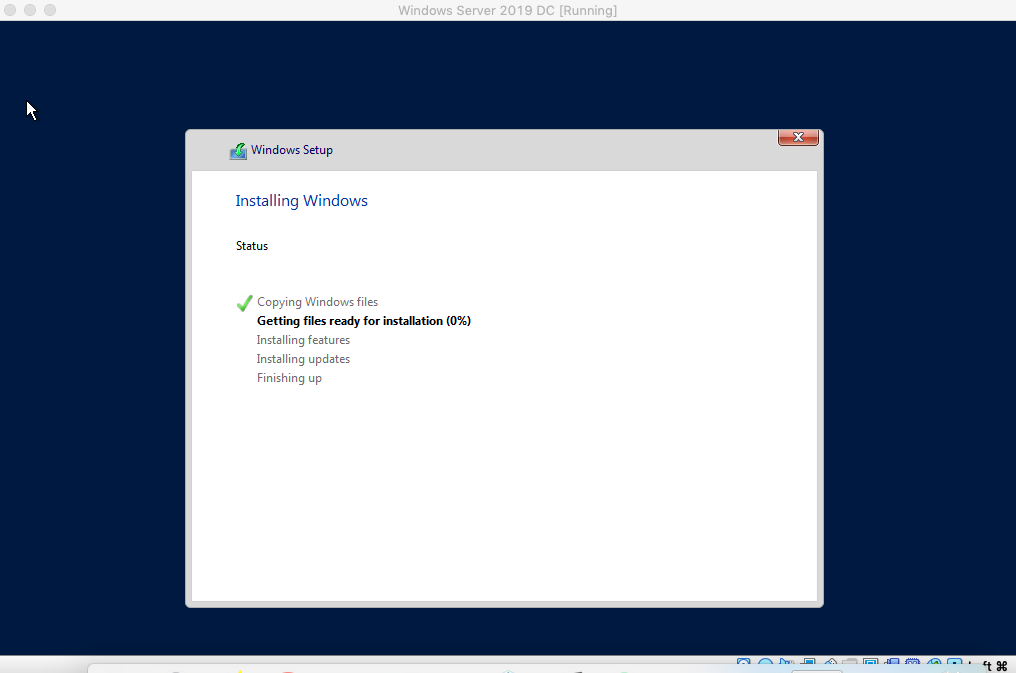
Wait while Windows installs. This may take 30 minutes depending on your computer.
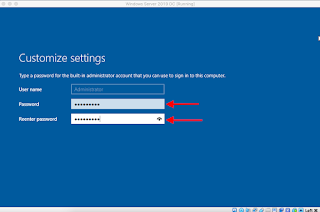
When it's finished it will automatically reboot and then reboot again. I timed my installation and it took exactly 10 minutes including reboots and loading screens. At the Customize settings screen type your built-in Administrator password twice and hit enter.

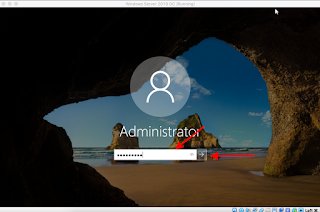
You are now at the log on screen. Since Control+Alt+Delete are system keys in order to send them to the VM you need to click Input>Keyboard>Control+Alt+Delete from the VirtualBox menu bar. Then type your password that you created in the previous step and press enter or click the arrow.

That's it! You are now at the desktop of your new Windows Server 2019 VM. You can see on the bottom right hand side of the screen that you have 180 days remaining in your evaluation. That's 6 months so that will give you a lot of time to practice.
Join me in my next blog where I will be showing you how to install VirtualBox guest additions!
https://eyeteahero.blogspot.com/2019/05/install-virtualbox-guest-additions-in.html
Additional resources:
- https://www.microsoft.com/en-us/evalcenter/evaluate-windows-server-2019
- https://docs.microsoft.com/en-us/windows-server/get-started-19/install-upgrade-migrate-19

